Add Application
Quick Start Templates are available, so you can test Sevalla’s application hosting with a Hello World repository or follow the steps below to add your own application.
To add an application, log in to Sevalla and click Applications > Add application. When you add an application, you can choose to link a Git repository or Docker image; the add application workflow differs depending on which option you choose.
Add an Application Using a Git Repository
Application details
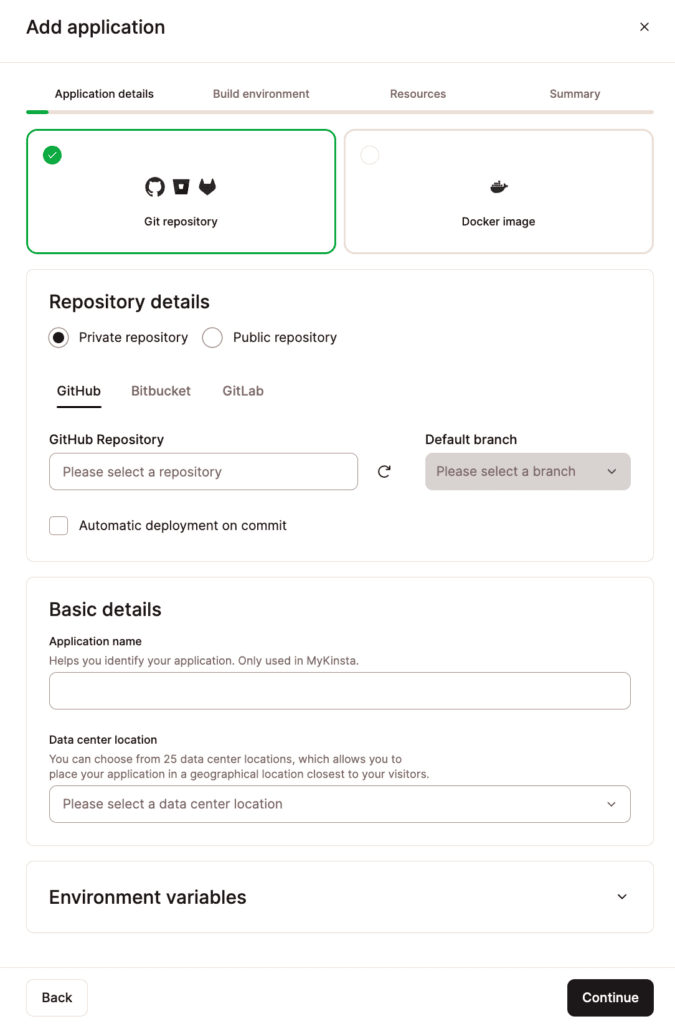
Add application details.
Repository details
- Private repository: Choose GitHub, Bitbucket, or GitLab and connect your account. Once connected, you can choose a Git repository and Default branch. Automatic deployment on commit allows you to automatically deploy your application each time a commit is made to the branch selected.
- Public repository: Enter the Repository URL and choose a Branch.
Basic details
- Application name: This name will be displayed in Sevalla for easy reference.
- Data center location: Choose the data center you want to use for this application.
warning
Currently, internal connections are only supported between applications and databases in the same region. If you’d like to use a database with your application, you can create the database at Sevalla and use an internal connection between the two (on the application’s Settings page or the database’s Info page).
Environment variables
Environment variables feed your application information from outside of the running of the application. They typically set things like database connection details and API keys. Expand this section to enter any environment variables for your application and select if the variables are to be available during runtime and/or the build process.
Click Continue.
Build environment
The build environment dictates how we build your application.
The built Docker image size limit is 5GB and the build timeout is 60 minutes. If the Docker image exceeds either of those values you’ll see the following deployment error: “The built Docker image exceeded the size limit. Choose another repository.”
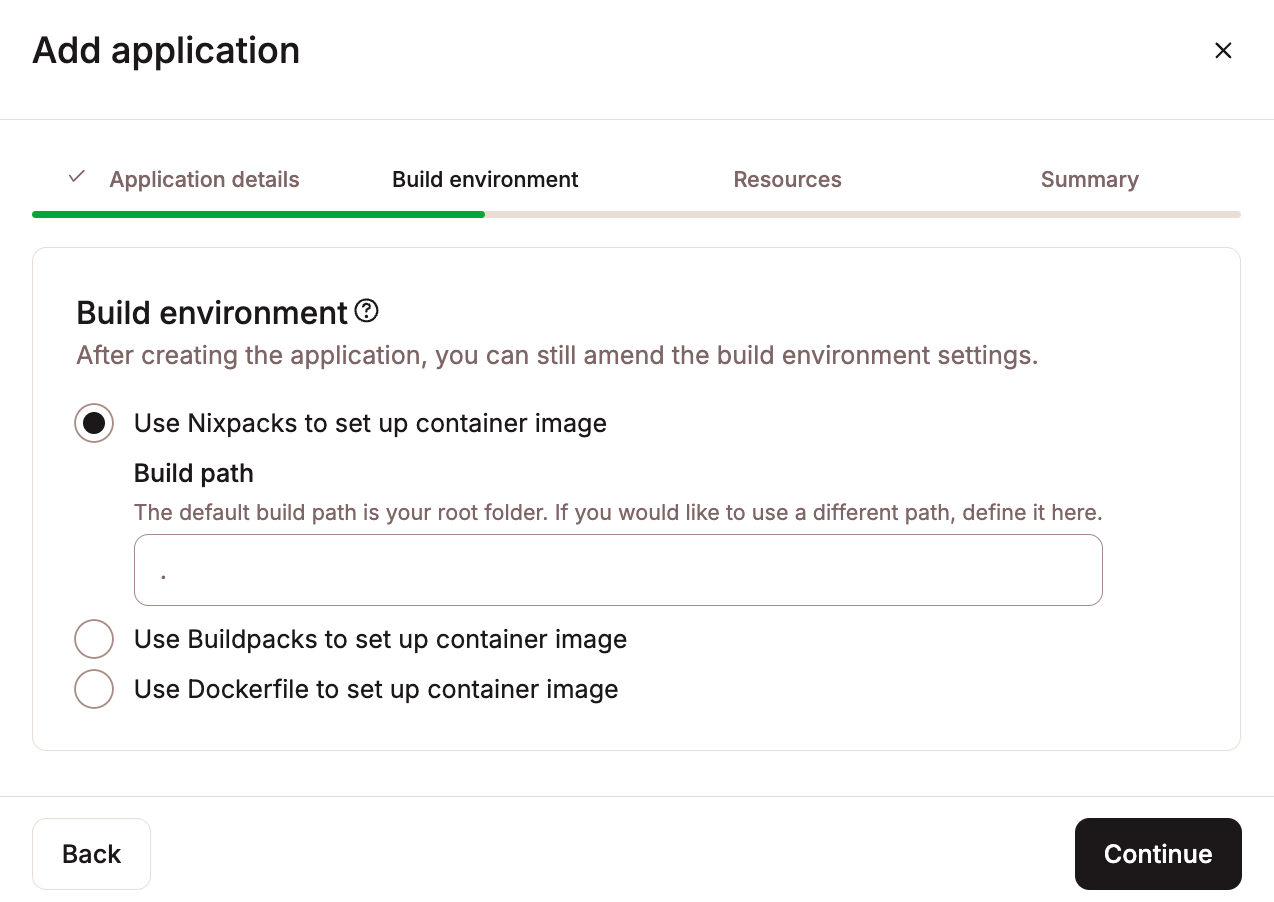
Configure your application’s build environment.
You can choose between using Nixpacks, Buildpacks, or a Dockerfile to create the container for your application:
- Use Nixpacks to set up container image: Choose this option to have Sevalla use Nixpacks to create a container for your application based on your repository. We’ll try to automatically determine the best environment for your project and create a container for it. If no version is specified, we’ll use the latest available version for the language your application is written in. If you want to use a different language version for your application, set the version in your application’s files.
- Build path: The path in the repository to the files required to build the application. Most applications are built from the repository root, and the Build path defaults to this (.). If you have a different build path, specify it here. For example, if your application needs to be built from a subdirectory (e.g. app), enter that subdirectory path in the Build path field: app.
- Use Buildpacks to set up container image: Choose this option to have Sevalla use a buildpack to create a container for your application based on your repository. We’ll try to automatically determine the best environment for your project and create a container for it. If no version is specified, we’ll use the latest available version for the language your application is written in. If you want to use a different language version for your application, set the version in your application’s files.
- Build path: The path in the repository to the files required to build the application. Most applications are built from the repository root, and the Build path defaults to this (.). If you have a different build path, specify it here. For example, if your application needs to be built from a subdirectory (e.g. app), enter that subdirectory path in the Build path field: app.
- Use Dockerfile to set up container image: If you want more control; or already have things set up in a Dockerfile in your repository, select this option and set the Dockerfile path and Context. With a Dockerfile, you can use almost any language.
- Dockerfile path: The path to your Dockerfile relative to the repository root. For example, if your Dockerfile is in the repository root, enter Dockerfile in that field. If your Dockerfile is in a subdirectory named app, enter the path to the Dockerfile: app/Dockerfile.
- Context: The path in the repository we need access to so we can build your application. Most applications are built from the repository root, and you can enter the repository root (.) in the Context field. If your application needs to be built from a subdirectory (e.g. app), enter that subdirectory path in the Context field: app.
Click Continue.
Resources
This allows you to set the resource, start command, and port for your web process. You also have the option to add persistent storage.
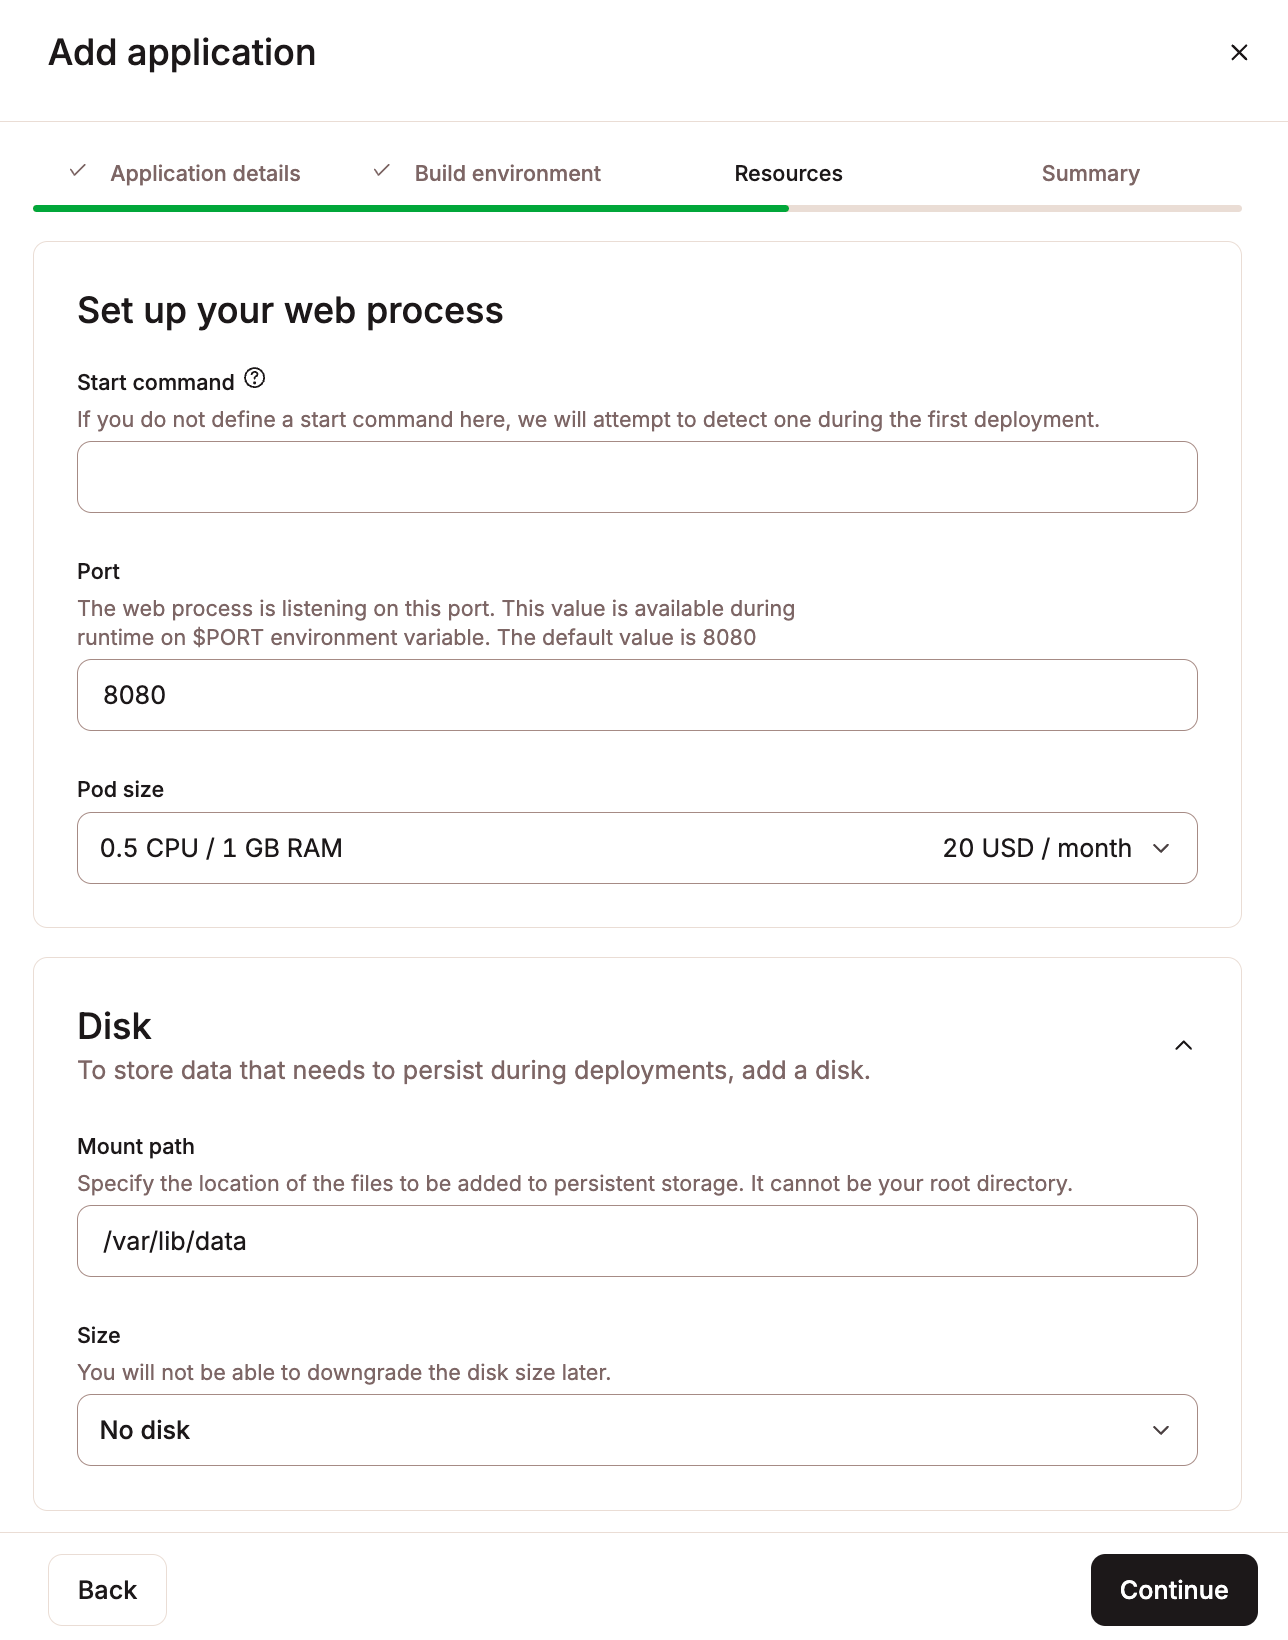
Set up your application’s resources.
Set up your web process
- Start command: Enter the start command for your web process. If you leave this blank, we’ll try to detect it during deployment. The start command for a process can also be edited on your application’s Processes page after deployment.
- Port: By default, the port for your application’s web process is 8080. This port is available during application runtime on the $PORT environment variable. You can define a different port; however, it must be within the range 1-65535 except for the following ports used by our core system: 15000, 15001, 15004, 15006, 15008, 15009, 15020, 15021, 15053, and 15090.
- Pod size: Choose the pod size for your process. This determines the CPU and RAM dedicated to the process.
- Note: If you choose a Hobby pod size for your web process, you will not be able to add a custom domain to your application. If you need a custom domain for your application, you can upgrade this anytime.
Disk
To add persistent storage to the web process, click Disk to expand this section and complete the following:
- Mount path: Specify the location of the files to be added to persistent storage (e.g.
/var/lib/data). If you use Buildpacks or Nixpacks to set up your container image, you must prefix the location of the files with/workspace. For example, if your files are stored inwp-content/uploads, the mount path should be/workspace/wp-content/uploads. Note: This cannot be the root directory or the directory of any configuration files. See the Persistent Storage doc for the full list of invalid mount paths. - Size: Choose the disk size for your persistent storage volume. You can increase the disk size at any time (on the application’s Disks page), but you cannot downgrade the disk size once it has been created.
Note: If you need to add additional processes like a background worker or cron job, you can add them on your application’s Processes page after deployment. If your application is stateless (no persistent storage), you can also enable automatic horizontal scaling for the web process within Processes. This lets you set a minimum and maximum number of instances (up to 10) that the process can scale between as needed.
Click Continue.
Summary
Review your application’s monthly usage costs and confirm your payment method. If needed, add a new card for the payment method.
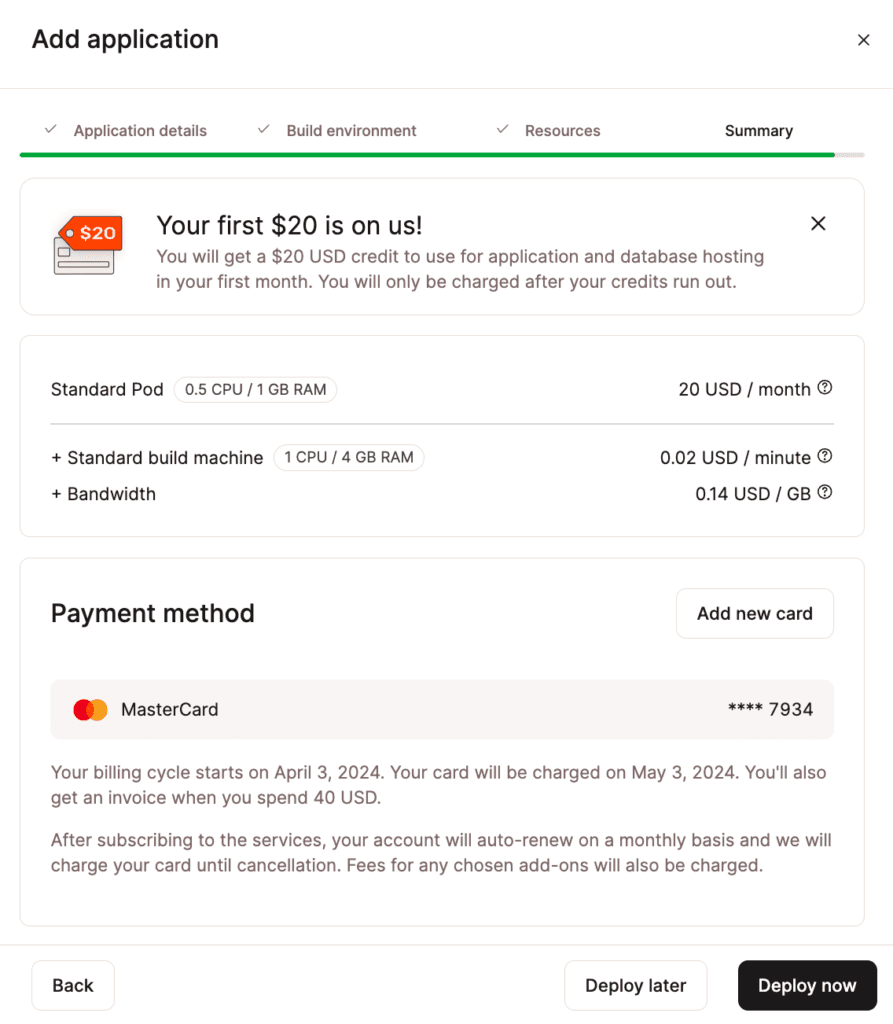
Review and confirm your application’s monthly usage costs and payment method.
Click Deploy Now to deploy the application immediately or Deploy later to deploy the application manually at a later point.
Add an Application Using a Docker Image
Sevalla only supports Docker images built for Linux/amd64 architecture. This is validated when you add an application and during the rollout phase.
Application details
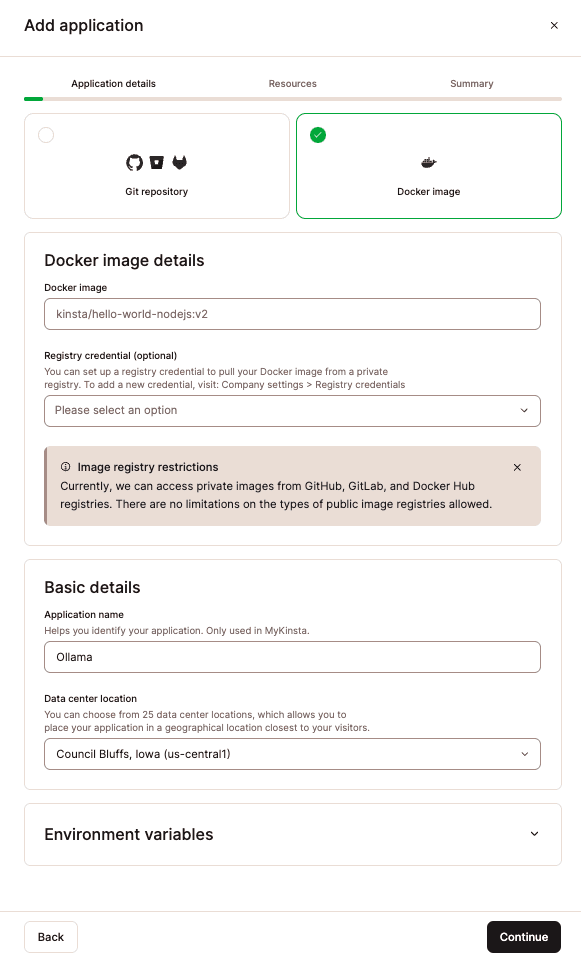
Add application details.
Docker image details
- Docker image: Enter the path to the Docker image. You can use public Docker images from any registry provider. You can access private Docker images from GitHub (ghcr.io), GitLab (registry.gitlab.com), or Docker Hub (docker.io) registries.
- Registry credential (optional): This is only required for private Docker images. You must enter your registry credentials within username > Company settings > Registry credentials. Once you’ve entered your credentials in the Company settings, you can choose which credentials you want to use.
Basic details
- Application name: This name will be displayed in Sevalla for easy reference.
- Data center location: Choose the data center you want to use for this application.
warning
Currently, internal connections are only supported between applications and databases in the same region. If you’d like to use a database with your application, you can create the database at Sevalla and use an internal connection between the two (on the application’s Settings page or the database’s Info page).
Environment variables
Environment variables feed your application information from outside of the running of the application. They typically set things like database connection details and API keys. Expand this section to enter any environment variables for your application and select if the variables are to be available during runtime and/or the build process.
Click Continue.
Resources
This allows you to set the resource, start command, and port for your web process. You also have the option to add persistent storage.
Set up your application’s resources.
Set up your web process
- Start command: Enter the start command for your web process. If you leave this blank, we’ll try to detect it during deployment. The start command for a process can also be edited on your application’s Processes page after deployment.
- Port: By default, the port for your application’s web process is 8080. This port is available during application runtime on the $PORT environment variable. You can define a different port; however, it must be within the range 1-65535 except for the following ports used by our core system: 15000, 15001, 15004, 15006, 15008, 15009, 15020, 15021, 15053, and 15090.
- Pod size: Choose the pod size for your process. This determines the CPU and RAM dedicated to the process.
- Note: If you choose a Hobby pod size for your web process, you will not be able to add a custom domain to your application. If you need a custom domain for your application, you can upgrade this anytime.
Disk
To add persistent storage to the web process, click Disk to expand this section and complete the following:
- Mount path: Specify the location of the files to be added to persistent storage (e.g.
/var/lib/data). If you use Buildpacks or Nixpacks to set up your container image, you must prefix the location of the files with/workspace. For example, if your files are stored inwp-content/uploads, the mount path should be/workspace/wp-content/uploads. Note: This cannot be the root directory or the directory of any configuration files. See the Persistent Storage doc for the full list of invalid mount paths. - Size: Choose the disk size for your persistent storage volume. You can increase the disk size at any time (on the application’s Disks page), but you cannot downgrade the disk size once it has been created.
Note: If you need to add additional processes like a background worker or cron job, you can add them on your application’s Processes page after deployment. If your application is stateless (no persistent storage), you can also enable automatic horizontal scaling for the web process within Processes. This lets you set a minimum and maximum number of instances (up to 10) that the process can scale between as needed.
Click Continue.
Summary
Review your application’s monthly usage costs and confirm your payment method. If needed, add a new card for the payment method.
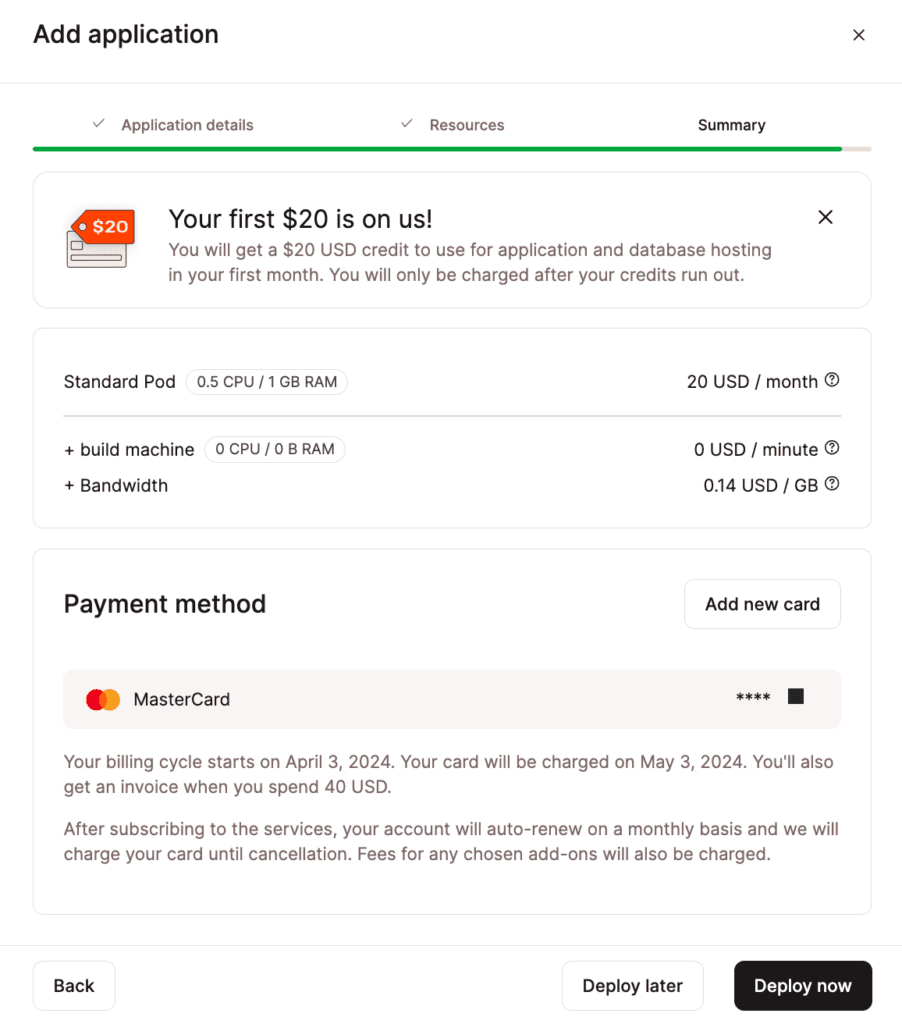
Review and confirm your application’s monthly usage costs and payment method.
Click Deploy Now to deploy the application immediately or Deploy later to deploy the application manually at a later point.
Visit App
Once your application is successfully deployed, you can open it using Visit App at the top of the Overview page within the application in Sevalla. The Overview page also shows you a diagram of your application so you can easily visualize its components and which ports it is listening on for incoming requests.
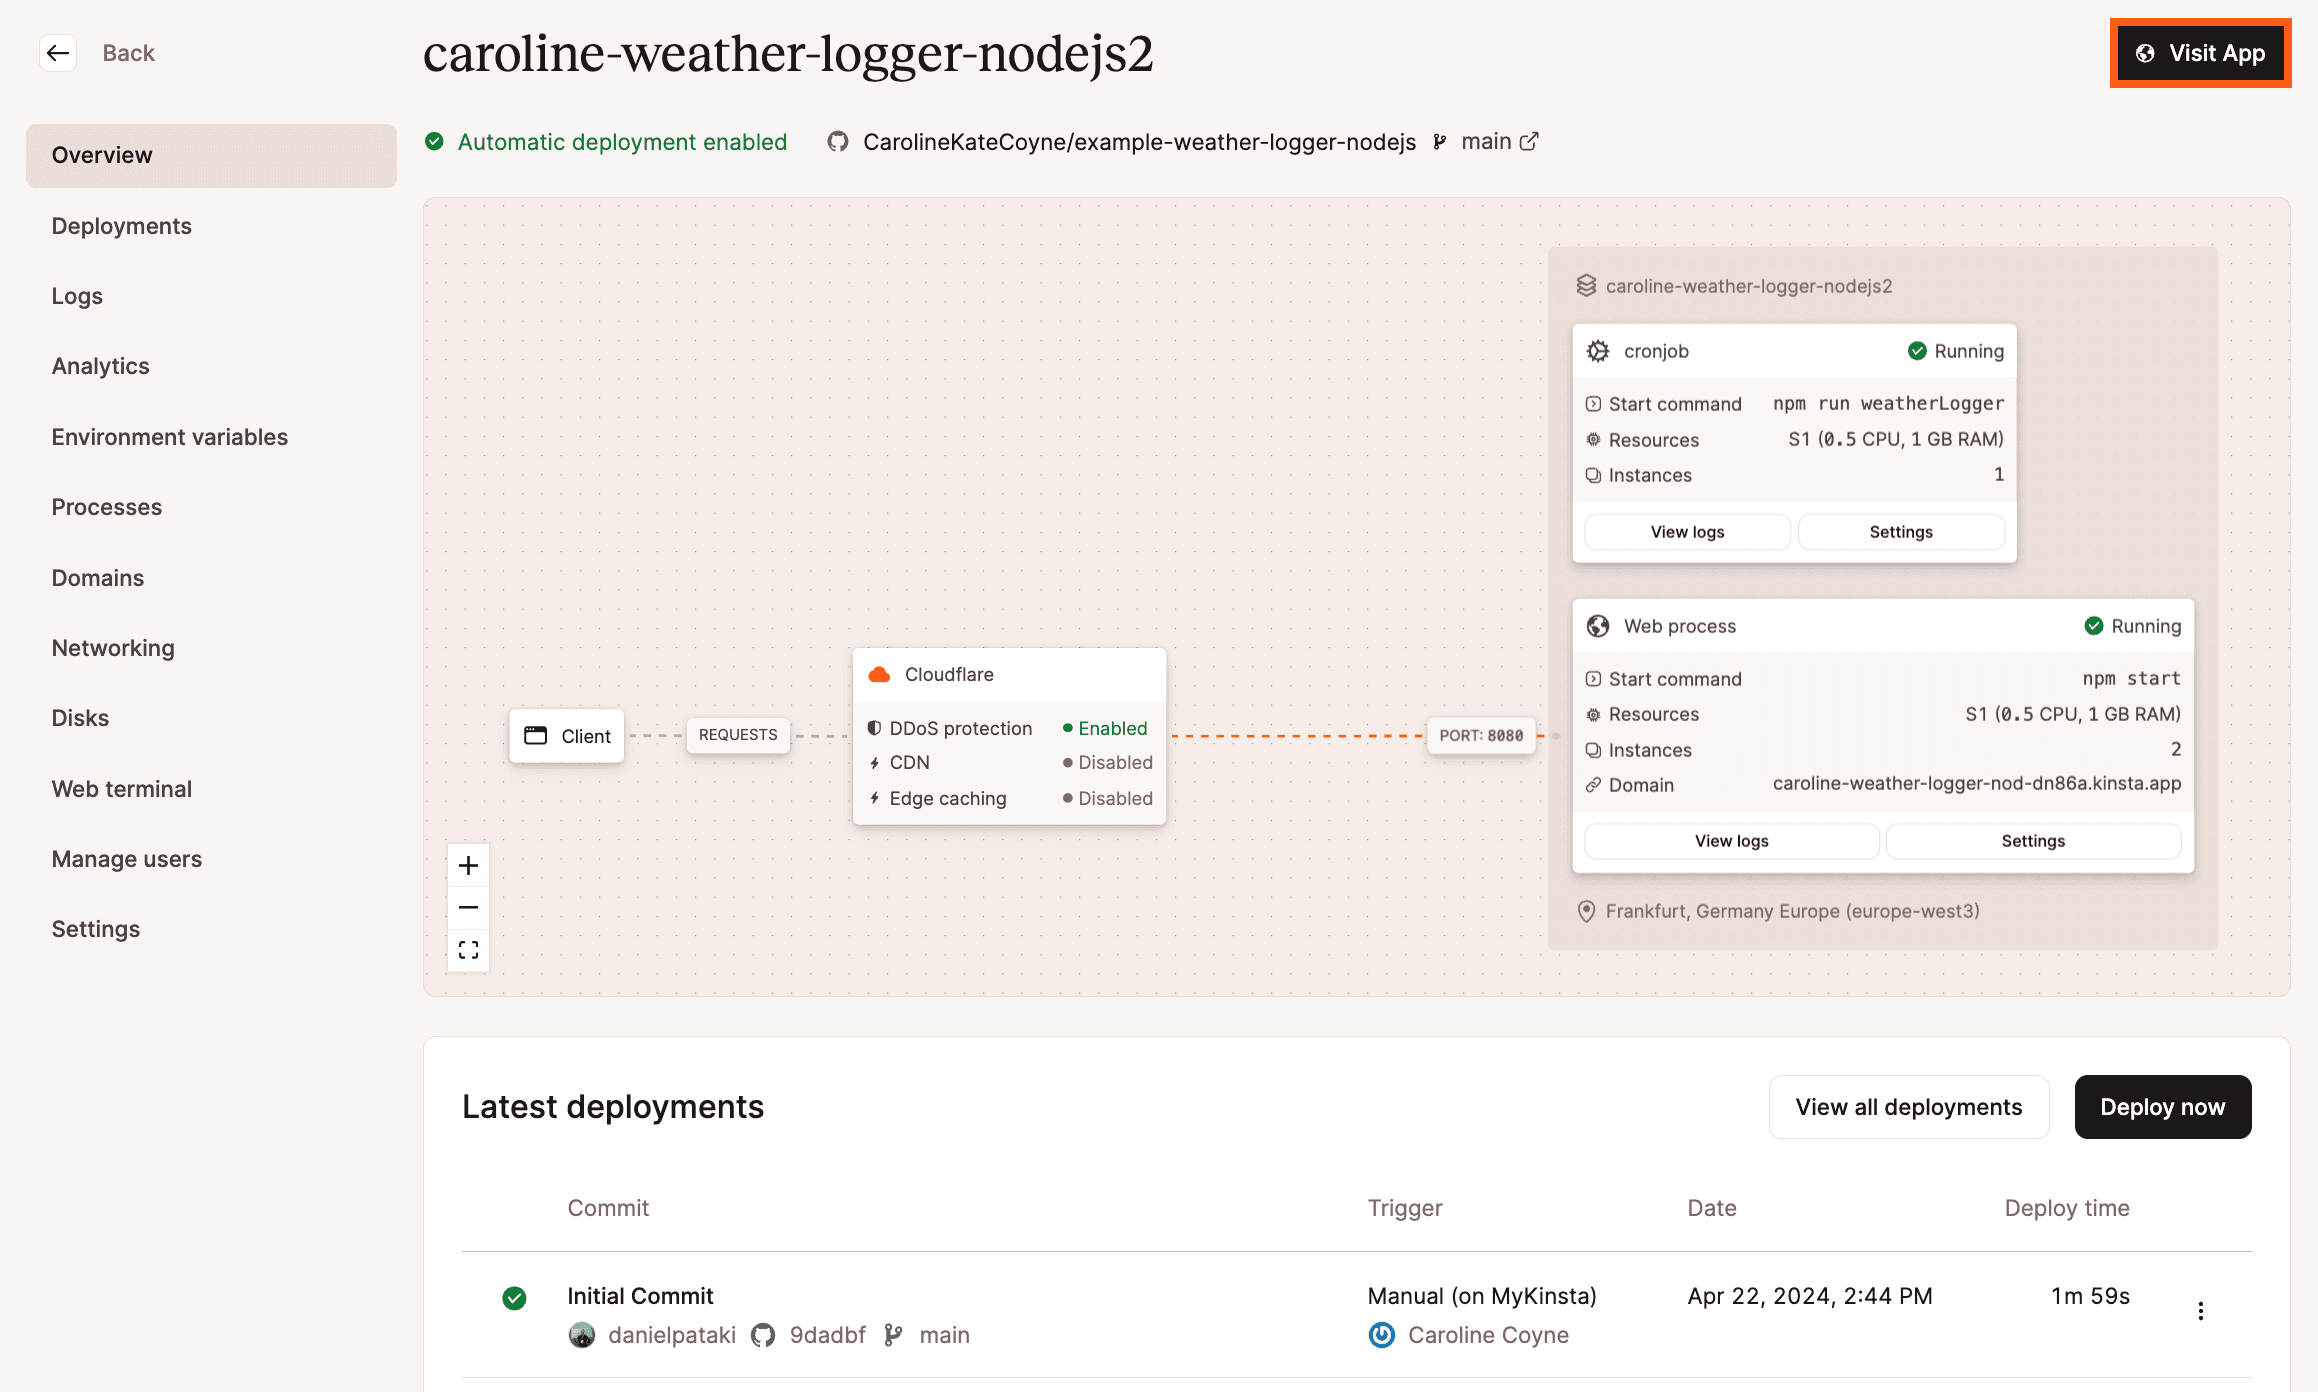
Open your application from the Overview page with the Visit App button.